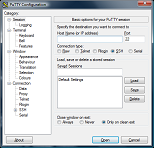
PuTTY is a popular free and open-source terminal emulator, serial console, and network file transfer utility. It is one of the most useful tools when performing SSH connections, especially from Windows machines.
PuTTY also supports other protcols such as Telnet, and serial connections to remote devices such as servers, routers, and switches using a CLI based interface .
Key features of PuTTY include:
- SSH, Telnet, and Serial Support - PuTTY can connect to remote systems using SSH (Secure Shell) for secure encrypted communication, Telnet for unencrypted communication, and serial connections for configuring devices like routers and switches.
- Terminal Emulation - It provides terminal emulation capabilities, allowing you to interact with remote systems in a text-based interface that mimics various terminal types (e.g., VT100, xterm).
- X11 Forwarding - PuTTY can forward X11 graphical applications from a remote server to a local display, enabling the use of graphical applications over SSH.
- Port Forwarding - It supports port forwarding, allowing secure tunnel traffic from local ports to remote systems and vice versa.
- Session Management - PuTTY allows you to save session configurations, making it easy to connect to frequently used remote hosts.
PuTTY is known for its simplicity, lightweight nature, and wide adoption among developers, sysadmins, and geeks.
Windows 11 Install PuTTY.
Open your browser and head over to the PuTTY download page in the link below:

Select the download PuTTY option to head over to the download page.

Next, under package files, locate the installer for your desired platform and click to download the msi file.

Once downloaded, double click the installer file to begin the installation process. Click Next to proceed with the installation proces.

Choose the installation location or press Next to accept the default.

Finally, choose the features you wish to have installed and click install button.

Once installed, Click Finish to close the installer. You have now successfully installed PuTTY on your Windows 11 machine.
You can launch PuTTY from the Windows Start Menu and configure it to your liking.
Conclusion
This post quickly walked you through the process of downloading and setting up PuTTY utility on Windows 11 based machine.


