
C++ 17, formerly known as ISO/IEC 14882:2017S is one of the modern versions of the C++ language standard. Although it is not the latest one at the time of writing this tutorial, that would be C++ 23 which replaced C++ 20, it comes with new features, improvements and simplifications to the language.
Some of the features and improvements introduced by C++ 17 include:
- Structured Bindings - This allows us to easily decompose complex data structures into components which helps in creating readable code.
- If-Init Statements - This feature allows us to declare and initialize variables within an if statement.
- Constexpr if = this is a more powerful version of
if constexprwhich allows compile-time conditions for metaprogramming. - Fold Expressions - Fold expressions simplifies variadic template programming.
- Parallel Algorithms - Standardized parallelism in the Standard Library with functions like
std::for_each,std::transform, andstd::reducefor better performance on multi-core processors. - Filesystem Library - C++ 17 Introduces a standard library for file system operations, making file handling more robust and cross-platform.
- Improved
autoType Deduction - Enhancements in theautokeyword's type deduction capabilities.
The above are some of the notable features and improvements provided by C++ 17.
Install and Enable C++17 on Windows
To work with C++ on Windows, we need to install a compiler that supports C++ 17 standard. The most versatile and common compiler for Windows is the Visual C++ toolset.
You can follow the steps as outlined below:
Step 1 - Download and install Visual Studio.
The first step is to download and install the Visual Studio Compiler. Open your browser and head over to the link below:


From the list of download options, select "Community Version".
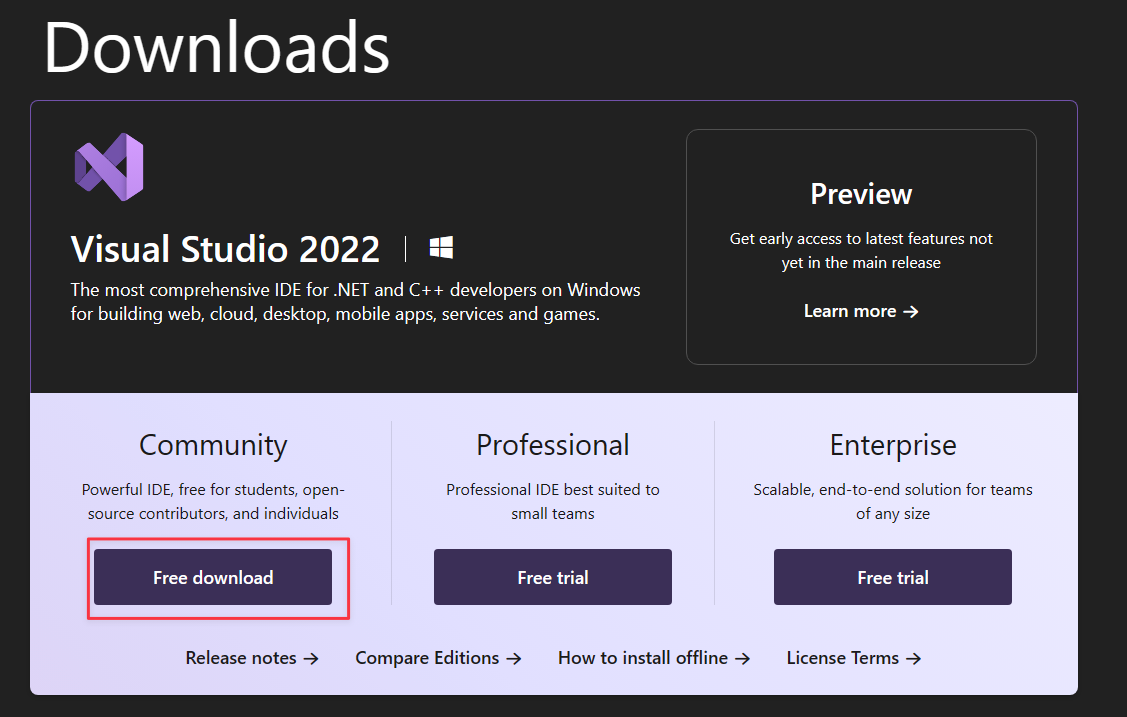
Once the download is complete, launch the installer and proceed with the installation.
During installation, select the "Desktop development with C++" workload, which includes the necessary components for C++ development.
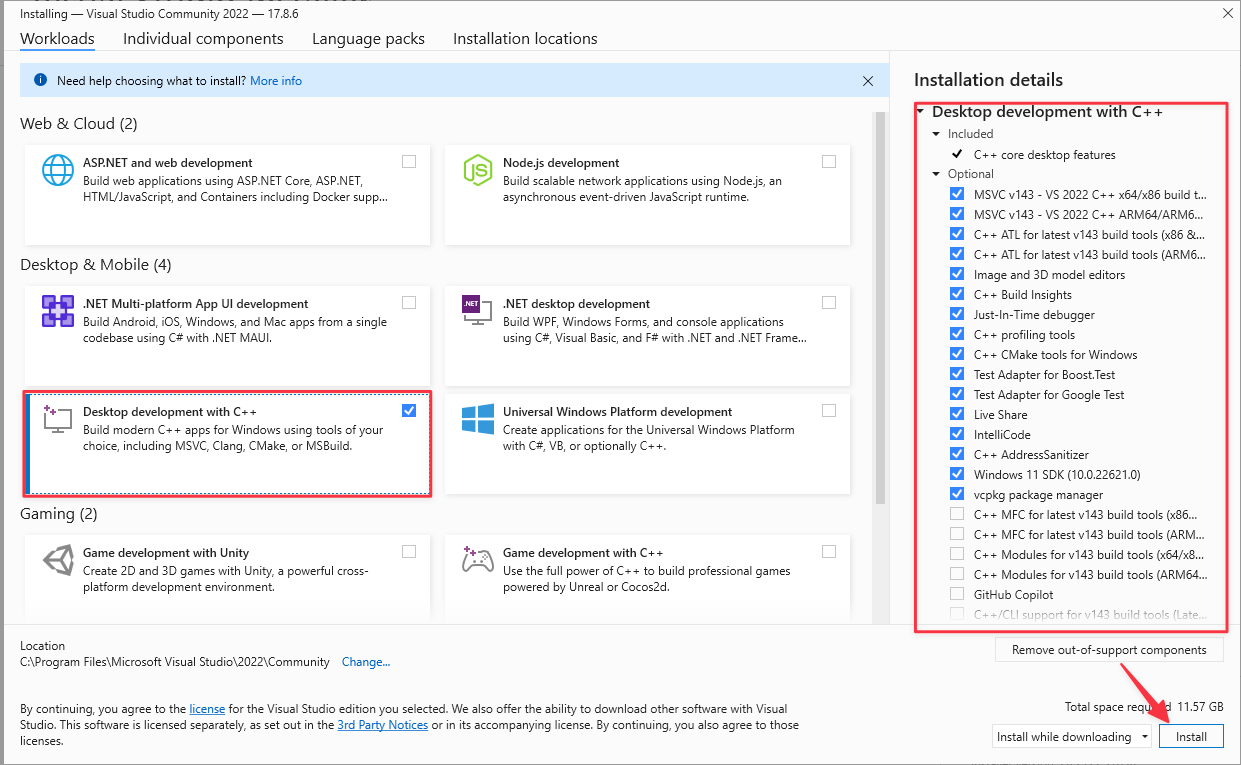
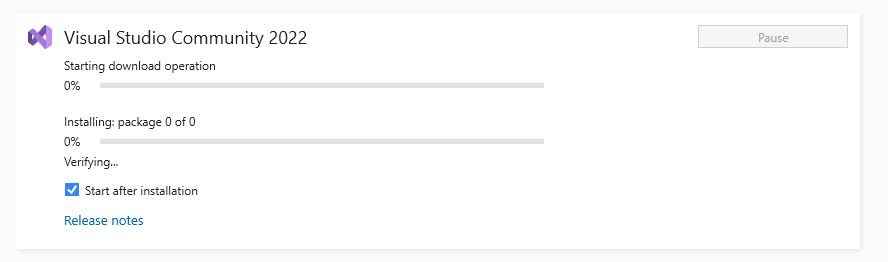
This should start downloading and install the C++ components on your machine.
Step 2 - Create a New C++ Project:
Once Visual Studio is installed, you can create a new C++ project:
Launch Visual Studio.
Next, Go to "File" > "New" > "Project..."
In the next step, choose a template for the project (e.g., "Console App") and select "Next."
Finally, configure the project settings, making sure to choose the appropriate "Platform Toolset" that supports C++17.
Step 3 - Configure Project Properties
To enable C++17 features for an existing project project:
Right-click on the project in the Solution Explorer.

Select the Properties option and head over the "Configuration Properties" section.

Locate the "C/C++" > "Language" section and set the "C++ Language Standard" option to "ISO C++17 Standard (/std:c++17)."

Enable C++ 17 on Visual Studio Code (MinGW)
If you are building your C++ on Visual Studio Code and using a compiler that supports C++ 17 such as MInGW, you can create a Visual Studio code as shown:

Create a tasks.json file in the project folder to define build tasks.
We can do this by going to "View" > "Command Palette" > "Tasks: Configure Task" and selecting "g++ build active file."
In the tasks.json file, make sure the "args" option includes the -std=c++17 flag to enable C++17. An example file is as shown:
{
  "version": "2.0.0",
  "tasks": [
    {
      "type": "shell",
      "label": "g++ build active file",
      "command": "g++",
      "args": ["-std=c++17", "-g", "${file}", "-o", "${fileDirname}/${fileBasenameNoExtension}.exe"],
      "group": {
        "kind": "build",
        "isDefault": true
      }
    }
  ]
}
Save the file and build your project. You can do this by pressing the command CTRL + SHIFT + B. This will build and run the code using the specified instructions.
Conclusion
In this tutorial, we learned how to install and configure the C++ compiler on Windows to enable support for C++ 17 on your projects. We covered both Visual Studio and MinGW compilers.